New Pull-Out Cabinet in Jean-Luc (our camper van)
[jean-luc]
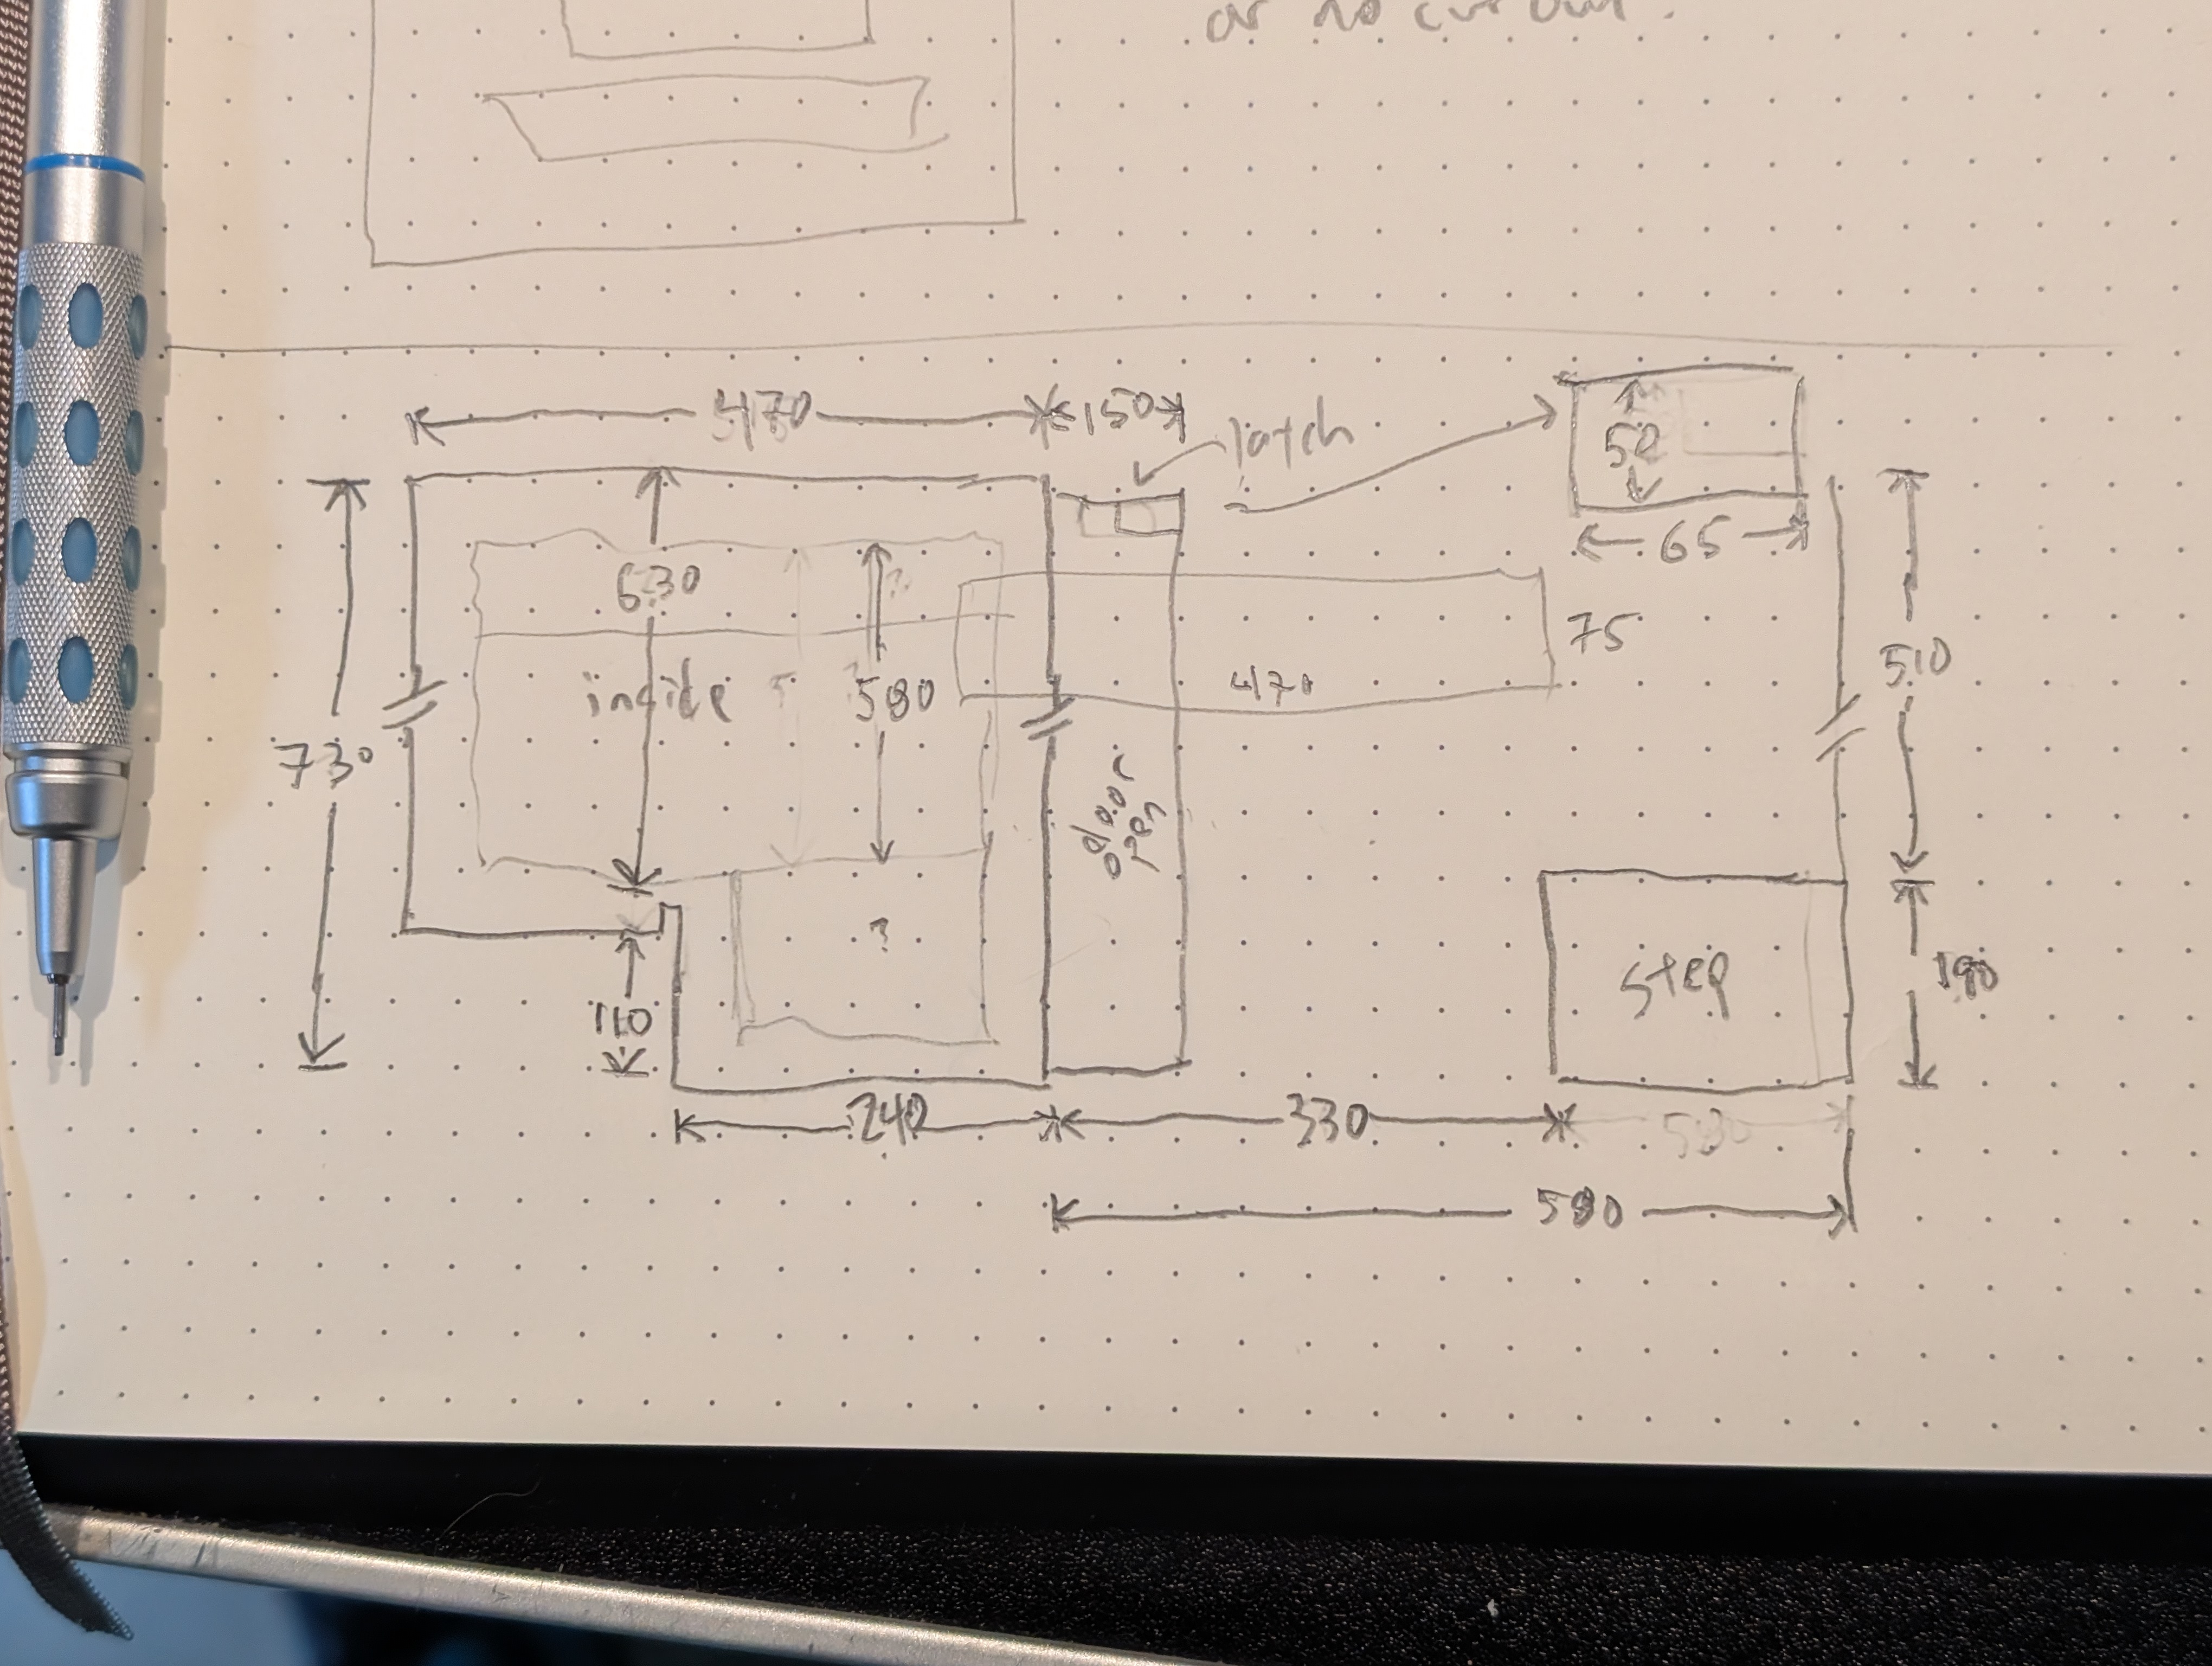
Yesterday evening I finished an upgrade to Jean-Luc, our Westfalia camper van. The factory conversion has a narrow (15 cm x 73 cm) storage cabinet in a small space between the refrigerator and the bed. We struggled to use the space, usually using it to store toilet paper, paper towels, and trash bags, just stuffed in there so they would fall out when we opened the door.
After dreaming of some kind of improvement for years now, I’ve finally done it!
The project started this last summer when I found a pre-made pull-out and bought it.
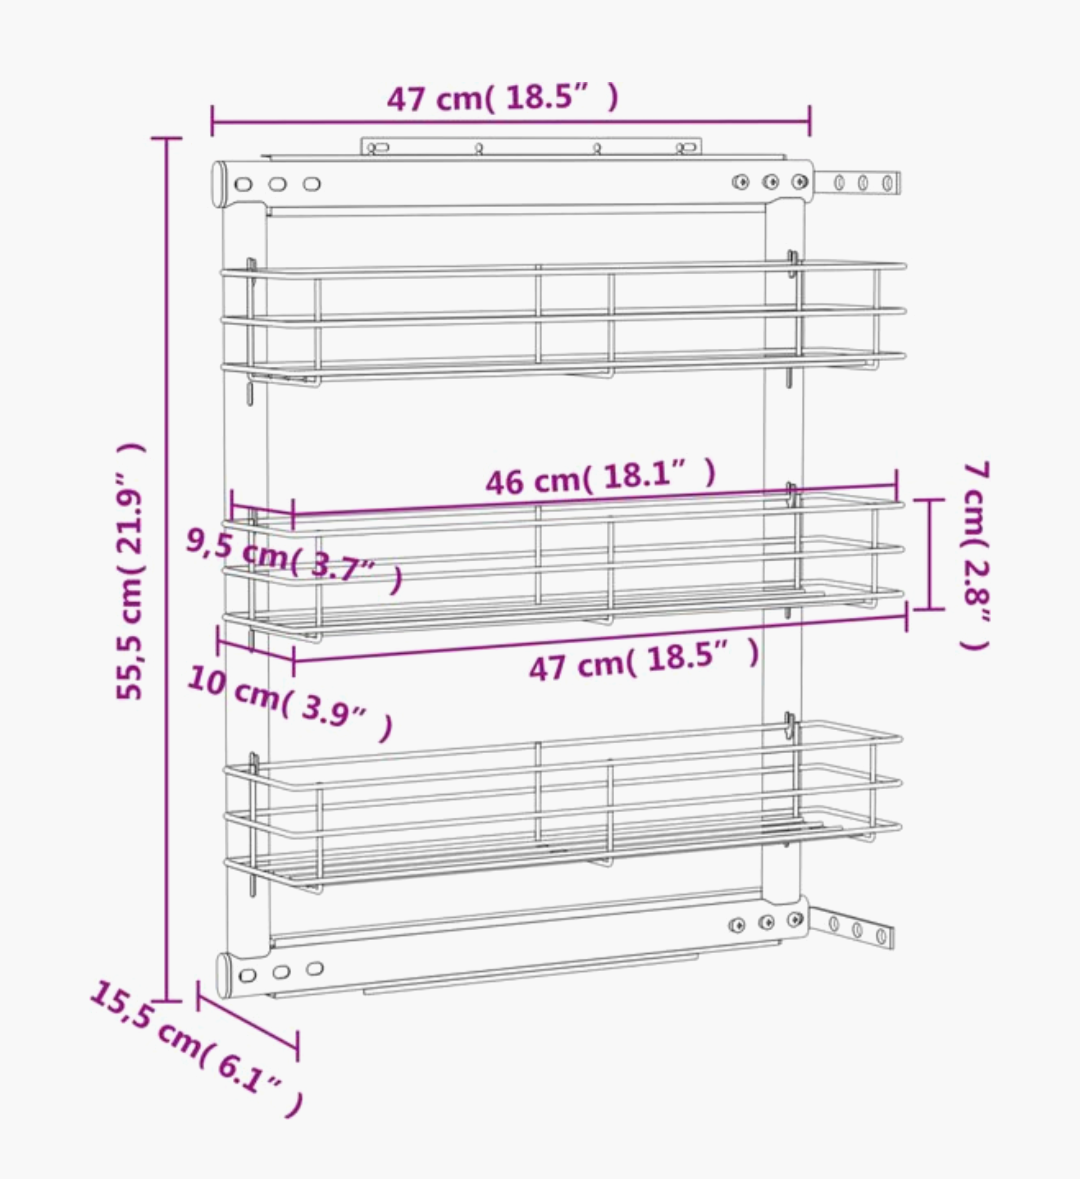
Unfortunately, I paid too much attention to the 10 cm width of the racks, and not the total width of 15.5 cm. I still tried to make it fit, which somehow it did with just a little scraping as it slid in and out. But the stress of forcing it in and the low quality caused the slides to fail almost immediately.
In the end I gave up, kept the three baskets, and discarded the rest of the hardware.
The reason the pre-made fixture failed was that the width of the frame, slides, and mounting hardware was 5.5 cm. If it were narrower, it would fit. There was also the difficulty of mounting the unit inside the space, which I did using a socket-wrench and a screw-driver bit to put the screws in. This requires me to be a contortionist, and it is hard to be accurate. The result was that a small misalignment put stress on the slides and contributed to the unit’s failure.
Fast-forward to last weekend. I found some very high-quality drawer slides produced by Junker Slides in Germany, designed to support 35 kg, and available in a wide range of lengths at 5 cm increments.
I used 9mm plywood to construct a mounting plate which would hold both slides inside the cabinet, allowing me to mount them outside of the cabinet to make sure they were perfectly aligned.
To get to the end, the system came together and appears to be working well!
Here is the backing for the baskets installed for test:
Here is the completed design, with the front door attached:
I made the modification so it is reversible if it doesn’t work out. The door hinge can be re-installed, and the cabinet returned to its original condition.
This has been a long running but ultimately very satisfying project. I will be testing it this weekend when I go to WHY2025!